It's that time of year again . . . TLC staff
will offer Grade Center checkup sessions during the week of August 22, 2016, to ensure
your Blackboard Grade Center is properly set up and ready for the Fall
semester. We will check to ensure that all columns are properly set up and included in the final calculation, that there are no hidden columns (seen by students but not by instructors), and that all columns are included in weighted categories (where applicable). We will also help you to reorganize your Grade Center from a weighted system into a total points system, where applicable. Each session will last approximately 30 minutes, depending upon the
number of courses you have. All sessions will be held in the TLC, 240A.
Please contact the TLC to register for one of the half-hour time slots available during any of these sessions:
- Tuesday, August 23 (12pm-2pm)
- Wednesday, August 24 (4pm-6pm)
- Thursday, August 25 (9am-11am)
After archiving your Blackboard course and saving the zipped file (should you need the course restored in the future), it's time to remove students from the course and prepare it to be used during a new semester. Bulk Delete Users/Groups/Statistics Bulk Delete removes users (students) and materials from a course site in order to prepare it to be used over again for a new semester. This is a permanent process - be sure that the archive process has been completed first; then follow these five steps for removing users.
Under the Control Panel of your Blackboard course site, click the Packages and Utilities menu item
Click on Bulk Delete
Check the parts of your Blackboard course you would like to delete - following are the minimum recommendations for course materials to be deleted:
Users / Groups / Statistics
You may also wish to delete announcements if you do not plan to use the same announcements for a future semester
NEVER bulk delete the Grade Center (as this will cause parts of your course to not function at all)
Type the word Delete (with a capital D) in the confirmation textbox
Click Submit
Please note: Not all student-submitted materials are removed from the site. Students' individual entries in discussion boards, blogs, journals, and wikis must still be deleted within those tool areas. Update Course for New Semester Once users/groups/statistics have been bulk deleted from the site, instructors should begin to check through all parts of the site to ensure that all content is up-to-date and ready to present during the following semester (prior to requesting a batch enrollment into the course). The following ten steps were taken from our Beginning A Semester guide for Blackboard instructors:
Ensure that all students, statistics, and other information from past semesters has been removed (bulk delete process)
Update information within your site – review items such as the syllabus, your contact information and office hours, assignment schedules/course calendars, and class policies
Review the Announcements, and delete or update them as necessary; also set dates for announcements to display as necessary (all announcements can be removed within the Bulk Delete process)
Remove asssignments and other materials you are not using this semester, or make them unavailable to your students – this includes materials provided by the textbook publisher when you are no longer using the book
Review your current assignments – update instructions, attachments, point values, and due dates as needed
Review discussion boards, blogs, wikis, and journals – delete entries from previous students, update instructions, check due dates and point values for any graded forums
Review manually-created columns within the Grade Center – remove any manually-created columns that are no longer needed, update due dates, add new columns as needed (for any assignments to be submitted in person, rather than via Blackboard)
Organize columns within the Grade Center (from the Manage > Column Organization option), and hide/unhide as needed (hiding columns within the Grade Center only hides them from the instructor; students can still see these in their My Grades area); use Hide from Students to hide columns from students
Check all links to ensure they are functioning correctly – this is especially important for external links, which could have changed or might have been removed from the Internet since the course was last used
Check availability settings for course content, discussion boards, announcements, tests/surveys, and assignments
View the Ending a Semester guide for a complete overview and step-by-step instructions for the entire end-of-semester process. For additional assistance with End-of-Semester Blackboard tasks, contact the TLC at tlc@icc.edu or (309) 694-8908, or visit us in room 240A on the East Peoria campus.
Next week our Blackboard Users' Group will meet in the TLC on Wednesday, May 4 at 12noon or Thursday, May 5 at 3pm - participants may attend either session.
Once you have backed up the Grade Center to Microsoft Excel, it's time to archive the entire course. Archiving a course site creates a backup copy of the entire course site, including all of the materials, settings, student files, and grades. This process will package your Blackboard course (as it exists when you archive it) into a zipped file that you save, should the course need to be restored in the future. Archived files must be restored by the Teaching and Learning Center (TLC) staff before you will be able to view any of the contents. It will be necessary for you to provide the zipped file to the TLC when you need to have a course restored. Follow this ten-step process for archiving a Blackboard course and saving the zipped file:
Under the Control Panel of your course site, click the Packages and Utilities menu item
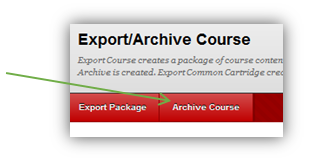
Click on Export/Archive Course
Click on the Archive Course button
Check the box to include Grade Center history
(if grades are recorded within Blackboard)
Click the Submit button
You should see a success bar near the top of the page
An email will be sent letting you know when the archive process is complete - this may take several minutes, depending on course size
Click the Refresh button in the main content window
If using Mozilla Firefox, click on the link for the archived file, and select Save (do not select open)
If using Google Chrome, click on the link, for the archived file
a button will appear in the lower left corner above the start button
DO NOT click this button
go to Step 7
To locate the saved file, open File Explorer(the file folder icon in the taskbar at the bottom of your desktop)
Open the Downloads folder from the left navigation panel
Right-click on the archived file, and select Cut
Save the zip file by navigating to your H:/ drive or jump drive (or to a location on your personal computer)
Then paste the file by right-clicking and selecting Paste
It may help to create a new folder called "Archived Courses" - if you don't already have one
You will need to provide this zipped file to the TLC should you need this course restored in the future
After the file is saved to your computer (or jump drive), return to the Export/Archive course page within Blackboard, click the drop-down mean next to the archive file link, and choose Delete to remove the archive file from your course
Once the course has been archived (with the archived file saved to a location where you can find it and then deleted from within the Blackboard course), you can remove the students and begin to prepare the course to be used during a future semester (if you wish to use that one again). Visit our ICC Blackboard blog again next week when we'll cover steps for bulk deleting users from the course and preparing the course for a new semester.
View the Ending a Semester guide for a complete overview and step-by-step instructions for the entire process. For additional assistance with End-of-Semester Blackboard tasks, contact the TLC at tlc@icc.edu or (309) 694-8908, or visit us in room 240A on the East Peoria campus.
There is a three-part process we recommended that instructors complete on their Blackboard courses following the end of each semester:
Back up Grade Center to Microsoft Excel
Archive Course
Bulk Delete Users
In this month's blog series, as we focus on topics for Ending a Semesterin Blackboard, we'll take a look at each part and its purpose, as well as how to prepare your courses for the next semester, over the next few weeks.
Backing up your Blackboard Grade Center to Microsoft Excel will allow you to have full access outside of Blackboard to the data saved to the Grade Center, should any questions arise over student grades (once the students have been deleted), without the need to restore an entire archived course. The Blackboard Grade Center can be backed up to Excel at any point during the semester, but we recommend it especially at the end of the semester, once all grades have been entered and updated. Update all Grade Center cells
Before downloading the Grade Center to Excel, ensure that all grades are entered for all students and that zeros are entered for missing assignments so that the final grade is accurately calculated
Download file to Excel
Once the entire Grade Center is updated, click the Work Offline button in the upper-right area of the full Grade Center
Select the Download option
Click Submit on the next screen, as the default options should work best
When the Download Grades window appears, click the Download button
Depending on whether you are using Mozilla Firefox or Google Chrome, take the following steps:
Mozilla Firefox: A popup window will appear to indicate that the Grade Center will open in Microsoft Excel - select Open With Microsoft Excel, and click OK
Google Chrome: A button will appear in the lower left corner above the start button - click this button to open the Excel document
Save the Excel File
Within Excel select File > Save As
Provide a file name for the document - it's helpful to include both the course name and semester (i.e., ENGL110_Fall2015)
Select a location to save your Excel file
H:/drive - if on campus - or jump drive or home computer
It may help to start a new folder called "Grades" (if you don't already have one)
Change the Save as type option from Unicode text (*.txt) to Excel Workbook (.xlsx) so that you can read the file within Excel (this step is extremely important so that you are able to read the file in the future)
Click Save
Close the Excel program
View the Ending a Semester guide for a complete overview and step-by-step instructions for the entire process. For additional assistance with End-of-Semester Blackboard tasks, contact the TLC at tlc@icc.edu or (309) 694-8908, or visit us in room 240A on the East Peoria campus. Visit our ICC Blackboard blog again in the next couple of weeks when we'll cover steps for archiving your Blackboard courses and bulk deleting users from the course.
This week we'll explore a third option for embedding video within your Blackboard courses - Blackboard's Video Everywhere feature. Video Everywhere allows Blackboard users (students, faculty, staff) to easily embed their own videos from YouTube within a Blackboard course. All ICC students, faculty, and staff have access to YouTube via their @lab Google accounts. While these are the traditional email accounts for students, faculty and staff should use their @lab Google accounts not for email, but for working with Google apps like Drive, Docs, Sheets, Slides, and YouTube, among others - learn more within our Google Accounts for Faculty and Staff guide. The Video Everywhere feature is available within Blackboard's content/text box editor, allowing users to make use of this feature "everywhere" in Blackboard that the content editor is available. Instructors could post weekly videos as part of the Announcements page, include video instructions or sample project videos within Assignments, or start a discussion forum with a video instead of text. Content editors are even available within the Grade Center, allowing instructors an option for providing video feedback to student assignment submissions. Students could use the Video Everywhere feature to submit assignments or post to a discussion board, blog, or journal. The Video Everywhere icon is available at the start of the bottom toolbar in any content editor box (highlighted below):
Clicking on this icon will open a new window that prompts you to sign in to your YouTube account. Once you enter your @lab email address and password, you can click on the Browse tab to view thumbnail images for videos already uploaded to your YouTube library. (Note: If you are already signed in to a different Google account within your browser, you will need to sign out of that account and then into the @lab account.) For each video you have uploaded to your YouTube account, you will have the option of either inserting the video into Blackboard, previewing the video before deciding to insert it, or editing the video within YouTube.
Once you select Insert, a screen with additional display options will appear. Play in place is the default selection with a thumbnail size of 120x90. A larger display would be more ideal - just be sure to keep the dimensions proportional. Once you click the Insert button, you may add additional text description, attachments, due dates, etc. to the announcement, assignment, discussion forum, etc. Need to learn more about how to record videos and upload them to your YouTube account? There are several options available:
Videos can be recorded from a SmartPhone and then uploaded to YouTube directly from your phone.
Videos can be edited in Movie Maker (Windows) or QuickTime Movie Recording (Mac)
The University of Idaho's BbLearn Help page Upload your video to YouTube provides an overview of each of the recording options listed above, as well as an excellent step-by-step overview (with screenshot images) of how to upload videos within a YouTube account. Additional Resources
For additional assistance with incorporating Web Content into your Blackboard courses, contact the TLC at tlc@icc.edu or (309) 694-8908, or visit us in room 240A on the East Peoria campus. Next week our Blackboard Users' Group will meet in the TLC on Wednesday, April 6 at 12noon or Thursday, April 7 at 3pm - participants may attend either session. Our May blog series will focus on the necessary steps for ending a semester in a Blackboard course and will include topics about backing up the Grade Center to Microsoft Excel, archiving courses, and bulk deleting users, and preparing a course for the following semester.
Last week's blog post presented ideas for using Blackboard's Mashup tool as a means for embedding media content like photos, audio, and video from their original sources within your Blackboard courses. Not all media available online has an option for being integrated via Blackboard's Mashup tool, but there are still ways to either link to or embed media content within a Blackboard course in order to reduce course size. Learn more at Blackboard Help's page - Best Practice: Reduce Your Course Size. LINK TO MEDIA CONTENT Instructors can link to external content via either the (1) Web Link option or the (2) link icon within the content/text editor box.
The Build Content drop-down menu available in any content area features a Web Link option. Selecting this option will allow instructors to add a title and URL and - optionally - a description or attachment(s). By default the link will open in a new tab. A web link will appear in Blackboard with a globe as the icon, followed by the name you entered. Clicking on the name (as shown in the image below) will open the web site in a new tab.
Check out Purdue University's video tutorial for a visual overview:
The other method to link to an external site is to do so within the content/text editor box. Anywhere the content editor is available (items, assignments, discussion boards, blogs, journals, etc.), an instructor can highlight text and then click the chain link icon to actively link it (shown in the image below). You will be given options on the pop-up window when you click the chain link icon. On the Target drop-down, be sure to select Open in a New Window (_blank) so that the user will remain in Blackboard and the link will open in a new tab.
These two methods for adding web links provide a means for linking to content on another website. A text link that can be clicked to access other content will be made available. Another option is to embed media into your Blackboard course so that the actual media appears within the Blackboard course (rather than having to open a link in a new tab), similar to the way it appears when using the Mashup tool. EMBED MEDIA CONTENT To embed media from an external website, you will need to access the embed code from that site, which is usually available by clicking a "Share" or "Embed" link. Once you copy the embed code, it can be pasted into any content/text editor box within Blackboard by clicking on the HTML icon (highlighted below).
For a complete list of steps for embedding Web 2.0 content, as well as brief descriptions of various types of Web 2.0 content that can be embedded into a Blackboard course or website, visit Blackboard Help's page - Best Practice: Web 2.0 Tools. Contact the ICC Teaching and Learning Center to learn more about embedding media content to help reduce course size. Visit our blog again next week to learn more about Video Everywhere, a means for embedding your own YouTube videos into Blackboard.
One of the "best practices" we try to promote in terms of Blackboard use is to keep course sizes small. Two main ways to do so are reducing file sizes prior to uploading them (by saving Word, PowerPoint, and other file formats as PDFs) and embedding audio/video content, rather than uploading it to Blackboard. Throughout this month's blog series we'll focus on ways to embed media content (photos, audio, video) from the web to reduce course size. You can learn more about this best practice in general via Blackboard Help's Reduce Your Course Size page. Our focus this week is on using the Blackboard Mashup tool, which allows you to embed media content from certain websites within a Blackboard course. The Mashup tool is available from both the Build Content drop-down menu and within the third (bottom) toolbar of the Content Editor box. Using the Mashup tool within the Content Editor allows you to embed media content in a variety of areas, such as discussion forums, assignments, and tests/quizzes. Learn more within Blackboard TV's video "How to Create a Mashup":
There are numerous advantages to using Blackboard's Mashup tool:
link to media content from YouTube, SlideShare, Flickr, or Atomic Learning resources
reduce Blackboard course size by embedding, rather than uploading, media
embed the actual content from its original source, rather than downloading and then uploading it
use online resources within copyright law since the source is automatically cited with the item
A Grade Center column is automatically created anytime you deploy a test within Blackboard, and Blackboard will automatically score any objective questions (i.e., multiple choice, true/false) based on the answers you provide when you create the test. If the entire test is objective, the test grade will automatically be added to the Grade Center as each student completes the exam. As an instructor, you will need to view the results for each test to be able to manually grade any subjective questions (i.e., short answer, essay, file response) and then save and post the test scores. Tests that need to be graded can be accessed from either the Needs Grading page or the Full Grade Center. To learn more about grading tests, which can include options to grade anonymously, grade all responses to a specific question, and give full credit for all responses to a question, see Blackboard Help's official Grade Tests page. From the Grade Center, you can also view statistical information, such as what percentage of students chose each multiple choice answer within each question. To do so drop down from the top of the Grade Center column for a particular test, and select Attempts Statistics. Learn more at Blackboard Help's official Test and Survey Resultspage. You can also run an Item Analysis on a test to view data about overall test performance as well as data about individual questions. Learn more at Blackboard Help's official Item Analysis page, as well as by viewing the following video:
Additionally, you can view a test attempt's Access Log for each individual student's test attempt to learn more about how much time a student spent on each individual question, as well as their start/end times for the test. To view the access log:
enter an individual student's test attempt
expand the Test Information session by clicking the arrow to the left of it
For additional assistance with Blackboard tests, visit the Tests, Surveys, and Pools Blackboard Help page, or . . . contact the TLC at tlc@icc.edu or (309) 694-8908, or visit us in room 240A on the East Peoria campus. Later this week our Blackboard Users' Group will meet in the TLC on Wednesday, March 2 at 12noon or Thursday, March 3 at 3pm - participants may attend either session. Our March blog series will focus on Web Content and will include topics about Mashups, embedded content, and Video Everywhere.
In last week's post we explored several options for building a test within Blackboard. Once a test is built, it exists for you as an instructor to be able to view or edit it, but it will not be visible to students until you deploy it within the course. To deploy a test or quiz within a Blackboard course, you need to first determine the content area where students should be able to access it. For some it works best to have a separate button on your Blackboard course navigation menu called "Tests" or "Tests & Quizzes." For others, the content for each chapter/module/unit is organized into subfolders of a content area, and each test or quiz should be placed within the appropriate subfolder. Organizing a course in this way is helpful to students so that they can find everything related to a particular chapter or unit of study in one place, rather than having to visit several different areas within a Blackboard course. To deploy a test that has already been built within a Blackboard course:
Navigate to the course area where you wish to deploy it
From the action bar on top, select Assessments
Click the Test option under the Assessment drop-down
Select a test from the available list (only those not yet deployed will appear)
Click Submit
This will take you to the Test Options page, where you can customize all of the following test settings for your students:
Make the Link Available This will make the test visible to students within the content area you have selected. You can make it available only after or until a certain date using the date options below.
Add a New Announcement for this Test/Survey The announcement lets students know that a new assessment has been made available within the course and provides a link to that assessment.
Multiple Attempts You can choose how many attempts students may take for each test, as well as which attempt's score will be used. The Feedback options (see below) allow you to customize what scores and feedback students are able to view following each attempt or the due date.
Force Completion Selecting this option forces students to complete the test in one sitting. If it is not selected, students may save their responses and come back to finish the test at a later time. The disadvantage to using this is that students can get locked out of a test (accidentally closing their browsers, losing an Internet connection) and will not be able to continue it unless you, as the instructor, clears an attempt (if you are only allowing one attempt). This setting would best be used when students are on campus taking a proctored exam via a wired Internet connection so that instructors are available to clear an attempt if necessary.
Set Timer This gives students a set amount of time to work on a test within Blackboard. It is often a better choice to use the Set Timer option rather than the Force Completion option. During the test the amount of time elapsed will display to students, and a one-minute warning will appear near the end.
Checking the box to Auto Submit will not allow students to continue working on the test once the timer runs out. Without this box selected, students are allowed to continue to the test once the time has expired; instructors will notice a late submission in the grade center and have the option of adjusting points accordingly if they wish to do so.
Display After / Display Until These are options for making the test available and unavailable before/after certain dates but do not need to be checked if you are making it immediately available via the first option on the page.
Password Passwords to access the test would best be used for an in-class setting so that students have to be present to get the password and be able to access the test. They are limited to 15 characters and are case-sensitive.
Test Availability Exceptions This area allow you to make exceptions from the general test settings for specific individuals. Exemptions can be made for number of attempts, timer, availability dates, and force completion.
Due Date Setting a due date will allow the test to appear on the Blackboard course calendar. It will also indicate to the instructor that a test attempt was submitted late. Instructors also have the option of not allowing students to start a test once the due date has passed.
Self Assessment Options These options are best left set to the default. Checking the second option will never allow you, as the instructor, to see a student's test score or performance. This would only be used in the case of a pretest/self-assessment if the instructor does not need to see or calculate the test results.
Show Test Results and Feedback to Students There are a variety of options available for choosing which results and feedback are visible to students following a test attempt (or multiple attempts). Students will always be able to see their test score (in the My Grades area), unless you hide that column from student view. For a full explanation of the various options, see the Feedback Options section on Blackboard Help's office Test and Survey Options page.
Test Presentation Test questions can be presented either all at once (on the same screen) or one question at-a-time. If presented one-at-a-time, instructors can choose whether to allow students to move back and forth between questions. The randomize questions option will display questions for each test attempt in a different order.
Click Submit to deploy the test to students with the settings you have selected. One the test is deployed and there is at least one attempt made, you are limited in terms of making changes to the test.
Visit us again next week when we present options for viewing test results and test access logs.
Various options are available for building quizzes and tests to be delivered to students via a Blackboard course. If your publisher provides a test bank (either Blackboard-compatible or as a zipped file of Word documents), TLC staff can help you import those into a Blackboard course. We can also assist with converting your own Word documents to Blackboard pools. Learn more about these options on our Test Question Processing document.
If test banks are not available from a publisher or you do not already have electronic or printed versions of tests, you can also create a test one-question-at-a-time within Blackboard. Additionally, use the options below to edit tests imported into Blackboard from a publisher. Build Test
Visit the Course Tools area under the Blackboard Control Panel
select Tests, Surveys, and Pools
select Tests
click the Build Test button
enter a name for the test (description and instructions are optional)
click Submit
There are three buttons available on the action bar of the Test Canvas page, allowing instructors to either build tests one-question-at-a-time or add existing questions from pools or tests already in the course: Create Question There are seventeen question types that can be used within Blackboard. Objective questions, such as multiple choice, matching, and true/false, can be automatically graded by Blackboard. Subjective questions, such as short answer and essay, will need to be graded by the instructor. There are also options like file response questions, which allow the student to upload an attachment - it is a good idea to have students prepare some things in advance and upload them, rather than taking a lot of test time to complete a more lengthy response. Learn more at Blackboard Help's official Question Types page. Many of the pages provide examples for each question type, as well as video tutorials. Reuse Question This is the option most commonly used, as it involves options to select questions from pools, tests, or a combination of both, to build a new test. We don't recommend choosing Question Set (the first option), but instructors can either select Random Block or Find Questions. Random Block allows you to pull numerous questions from a pool and assign a given number of questions to each student so that they are all receiving a different set of questions (for example, you can take 100 questions from a pool and randomly assign 20 or 25 to each student). Find Questions allows you to select specific questions from various pools or tests to build a new test. Learn more at Blackboard Help's Reuse Questions page. Upload Questions Microsoft Excel or .txt files can be specially formatted and uploaded to Blackboard to create a test. Learn more at Blackboard Help's Upload Questions page. Building a test makes it available to you as an instructor and allows you to edit it at any time, but the test will not be visible to students until you deploy it. Visit us again next week for an overview of deploying tests within Blackboard and the various options involved.
Rubrics are excellent assessment tools for any type of assignment or project. Not only do they communicate clear expectations to students, but they also assist instructors when it comes time for evaluating student work. "Rubrics can help ensure consistent and impartial grading. . . Students can use the rubric to organize their efforts to meet the requirements of an assignment, and [instructors] can use them to explain evaluations to students." (taken from Blackboard Help's Rubrics page)
Learn more about creating Rubrics for Blackboard submissions . . .
Anything within Blackboard that has points associated with it (assignments, discussion board, journals, blogs, etc.) can have a rubric linked to it. By default, rubrics are not visible to students, but these settings can be easily changed. When you allow students to view rubrics, they can preview the rubric before submitting an assignment and can view the scored rubric once you grade the submission to find out how many points they received for each portion of the assignment or project. Learn more about using Rubrics to grade Blackboard submissions . . .
Instructors can customize any of the criteria and levels of achievement for any rubric. Rubrics scores can be set based on points/percentages, as well as a range of either one. A single rubric within a Blackboard course can be assigned to multiple assignments/projects, or each assignment/project can have its own rubric. Rubrics can be created as part of the assignment creation process or can be created within the Course Tools > Rubrics area of the Blackboard Control Panel and later added to any assignment/project. Visit Blackboard Help's official Rubrics page to learn more about creating, editing, and managing rubrics. There are some great online tools for building rubrics that can be helpful if you're looking for ideas for descriptions for each criteria. You can gain ideas from these rubrics to use as you build your own within Blackboard. Visit either of the following sites for rubric information and ideas (be sure to read and follow the terms of use / usage policy for each one):
For additional assistance with Blackboard Assignments, including inline grading and rubrics, contact the TLC at tlc@icc.edu or (309) 694-8908, or visit us in room 240A on the East Peoria campus.
Next week our Blackboard Users' Group will meet in the TLC on Wednesday, February 3 at 12noon or Thursday, February 4 at 3pm - participants may attend either session.
Our February blog series will focus on Tests & Pools and will include topics about building and deploying tests, as well as viewing test results and access logs.
Inline Grading is a Blackboard feature that allows instructors to comment directly on student submissions within the Blackboard environment, eliminating the need to download the assignments, comment on them, and then re-upload them to Blackboard. Check out Blackboard TV's overview the Inline Grading features below:
In order for instructors to use the Inline Grading feature, students must upload files in Word, Excel, PowerPoint, or PDF formats. This feature will not work with files uploaded in other word-processing formats. Students who use a program other than word to type an assignment should save as PDF before uploading the assignment to Blackboard. Inline grading allows you as the instructor to comment on certain words, sentences, paragraphs, or entire areas of a student submission. You can highlight certain passages, place markers at certain points within the text, or draw boxes around areas within the document and then provide comments in the margin. You can also strike out certain words and provide text comments directly on the paper as well. Additionally, both instructors and students can download an annotated version of the paper with all instructor comments included. For a more detailed overview of how the Inline Grading features work, check out the following video from Case Western Reserve University:
Why create and have students submit assignments in Blackboard, rather than collecting them during class? There are several advantages:
Maintain an electronic record of student submissions that can be accessed at any time, rather than collecting, maintaining, and returning actual papers.
Make it easy to track any late assignments by viewing the date/time stamp for any submission.
Have columns automatically generated within your Blackboard Grade Center whenever you create an assignment (or anything else that has points associated with it).
Automatically generate calendar items/reminders within Blackboard, allowing students to track upcoming deadlines and due dates.
Check student assignments for plagiarism using the Safe Assign option available when creating an assignment.
Use Inline Grading features to comment directly on student assignments, rather than having to download, comment, and re-upload submissions (continue to follow this month's blog to learn more about Inline Grading).
Use Blackboard Rubrics within the Grade Center to score and provide feedback on student submissions (continue to follow this month's blog to learn more about Rubrics).
Maintain a record of student assignment submissions as part of the course archive once the course has ended.
Assignments can be created within any content area of a Blackboard course by selecting the Assignments option under the Assessments menu; learn more at the official Blackboard Help page Creating Assignments. The only requirements are the assignment name and points possible, but there are several other options available as part of the assignment-creation process.
Assignment Files - Use this area to upload any files associated with the assignment, similar to the way you would upload an attachment within an email. Remember . . . unless you need students to make changes to a file (such as a Word or PowerPoint file), always convert and upload files to Blackboard as PDFs.
Due Dates - A due date will display to students when they open an assignment. It will also add the assignment to the Blackboard calendar view, where students can click on the calendar item to go directly to that assignment. When you grade a student assignment, you will be notified if the assignment was submitted after the due date/time.
Grading - Under the Submission Details option, we recommend allowing students two attempts for each assignment, rather than keeping the single attempt default setting. Let students know that you will grade their last attempt and will ignore the first one if they submit two; this avoids the need to clear assignments and then communicate with students about resubmitting. Learn more about Multiple Assignment Attempts.
Within the same area, instructors can check any of the boxes in the Plagiarism Tools area. Checking a paper using SafeAssign will check a student's paper against several databases and can be used as a great teaching tool as well. Learn more about Using SafeAssign in Assignments, and check out the Quick Hit video below: